Setup & quick start for linovum smart lighting with Tuya

Congratulations on your purchase of a linovum smart light source. On this page you will find out everything you need to know about setting up and operating the lights and how to connect them to a voice assistant such as "Amazon Alexa" or "Google Home".

You do not necessarily need a voice assistant to operate the luminaires. You can also control the luminaires directly with your smartphone and the "Smart Life" app. However, operation by voice control increases the comfort considerably, as you do not have to pick up your smartphone every time.

Before you get started, here is an important note:

Please ensure that your WLAN is set to 2.4 GHz. Operation with Tuya is not possible in 5.0 GHz mode.
If you split the frequency of your router (2.4 GHz & 5.0 GHz), then it is important that the name and password of the two WLANs are different.

You can check this in the settings of your internet router under the item "Wi-Fi".

Information on the use of the smart lighting outdoors:

If you want to combine our smart light source with an outdoor light, we recommend that you first configure the light source on the router.
Then you can try it out in the garden to see how far the Wi-Fi connection is stable.

Please note that the range of your Wi-Fi connection is crucial for the functionality of the smart light outdoors.

Our linovum smart light source complies with directive 2014/53/EU.

You can download the complete text of the EU declaration of conformity as a PDF document on the following page:

https://www.linovum.de/doc

1. Installing the Smart Life App

The first thing you need is the Smart Life app, regardless of whether you want to control your smart lights directly or via voice assistant.
The app serves as an interface between your lights and the configuration.

1.1 Download the Smart Life App

Visit the Google Play Store or App Store with your smartphone. The Smart Life App is available for Android & iOS:

Smart Home App Tuya im Google Play Store downloaden

Download for Android

Smart Home App Tuya im Apple App Store Store downloaden

Download for iOS

1.2 Register with Smart Life

After installing the Smart Life App: Click on "Sign Up" at the beginning.

Now enter your e-mail address and confirm it with "Get Verification Code". This step is for your own security.

Now wait until you receive your code by e-mail and enter it in the app.

Now choose your personal password. Please note that the password should be as secure as possible (upper & lower case letters, numbers and special characters).

1.3 Add light sources & lamps in the app

Important notice:

When installing several lights, we recommend that you couple only 3 lights at a time.
Otherwise, the commissioning may not work smoothly.
However, a total of more than 3 lights can be installed per circuit.
Only the setup up should be done one after the other (3 lights each).

After registering, you will see the following screen - click on the plus symbol at the top right and choose "Add Device".

Now select "Lighting" in the left-hand menu and then "Light Source (Wi-Fi)".

Select your Wi-Fi Network and enter the corresponding Wi-Fi password. Make sure that your Wi-Fi is set to 2.4 GHz!

First switch on the purchased light with the smart light source. If the light flashes directly (your light at home, not in the app), select "Confirm the indicator is blinking" Otherwise, select "Reset Device Step bye Step" and follow the described steps. The light should start flashing after a short time. If not, repeat the step.

After confirming, that the light ist blinking, select the status of the light.

Wait until the light is found and added.

Once your light has been found, we recommend giving it a meaningful name (from [model name] to e.g. Smart Light GU10). Click on the pencil in the upper right corner to change the name.

Congratulations – you have set up your first light. For further lights, repeat the steps starting from step 1.3.

1.4 Control lights with the Smart Life App

After you have clicked on your light or group (will be explained later), you can use the rotary controls to adjust the colour temperature or dim the light.

Click on "Colour" at the top of the menu to set the colour of the light. In addition, you can also dim or adjust the colour intensity here.

Scenes are ready-made programmes that automatically change the light or the light colour, for example – just try it out!

At the bottom left you will find the timer. Here you can set when the light switches on or off automatically, just like on a TV.

1.5 Create light groups

If you want to assign several lights to a group (e.g. dining room or living room), carry out the following steps:

Go to the overview, where you can see all devices and click on the name of one of the lights you want to add to a group.

Click on the pencil at the top right.

Choose "Create group".

Now select all the lights you want to assign to the group and click save at the top.

You will now be asked to give the group a name (e.g. Living room).

Done – now you can control all lights within a group in the same way as individual lights (described in step 1.4).

2. Control with Amazon Echo (Alexa)

To avoid always having to operate the smartphone, you have the option of pairing your Smart Life App with Amazon Echo.
To be able to carry out the configuration, you need the Alexa App on your smartphone.

2.1 Connection with Amazon Echo

After setting up the Smart Life App, start your Amazon Alexa App. Click on "More" in the menu.

Select "Skills & Games" on the left side.

Use the search function to find the "Smart Life" skill. Then click on it.

Press the "Enable To Use" button to activate the skill.

In the last step, you must agree the connection by clicking "Agree and link".

The Amazon Echo Smart Life Skill has been linked successfully. In the next step, add your lights.

2.2 Add lights to Amazon Echo

Now add the lights you have set up in the Smart Life App to your Echo. To do this, press "Detect Devices". Searching for new devices can take up to 45 seconds. Wait and do not switch off the smartphone.

You will then see the lights in the overview. These have the same names that you previously assigned in the Smart Life App.

2.3 Create groups in Amazon Echo

New group: Click on "Devices" in the main menu, then on the plus at the top right and select "Add Group".
Existing group: Click on the group and select "Edit" at the top right. Here you can select the light sources.

You will see an overview, how to set up a group. Click "Next".

Give the group a name, e.g. Living room.

Select the lights to be grouped.

The group is ready.

2.4 Voice commands to control lights with Amazon Echo

Below is an overview of the most important commands for controlling your smart lighting with Amazon Echo:

  • „Alexa, turn [device name or group name] lights on.“
    Example: Alexa, turn living room lights on.
  • „Alexa, turn [device name or group name] lights off.“
    Example: Alexa, turn living room lights off.
  • „Alexa, [device name or group name] lights on.“
    Example: Alexa, living room lights on.
  • „Alexa, device name or group name] lights off.“
    Example: Alexa, living room lights off.
  • „Alexa, brighten the lights [device name or group name] to 50 %.“
    Example:Alexa, brighten the lights living room to 50 %.
  • „Alexa, make my lights [device name or group name] warmer.“
    Example: Alexa, make my lights [device name or group name] warmer.
  • „Alexa, [device name or group name] lights red.“
    Example: Alexa, living room lights red.

3. Control with Google Home

You can also control your smart lights by voice via the Google Home smart speaker.
To be able to carry out the configuration, you need the Google Home app on your smartphone.

3.1 Connection with Google Home

After setting up the Smart Life App, start your Google Home App. Search the button "Connect Smart Life" in the upper horizontal menu and click on it.

Agree the connection by clicking "Agree and link".

Choose the devices, you want to connect.

Now select a room that you want to assign to the light. In our example, "living room".

The added devices are now visible in the home screen of the Google Home app.

3.2 Control lights with Google Home

You can now control the light via the app (voice commands follow below). Click on the light or room to enter the control center.

Here, the rotary control can be used to dim the brightness, switch the light on/off and adjust the light colour.

After clicking on the "Colour" button, you can choose from one of the numerous colour modes.

3.3 Manage lights in rooms & groups with Google Home

Click on settings on the home screen to edit a group.

Choose the item "Rooms and groups".

Select the room you want to manage.

Here you can change the name of the room, add devices or delete the room.

3.4 Voice commands to control lights with Google Home

Below is an overview of the most important commands for controlling your smart lighting with Google Home:

  • „Ok Google, turn [device or group name] on.“
    Example: Ok Google, turn living room on.
  • „Ok Google, turn [device or group name] off.“
    Example: Ok Google, turn living room off.
  • „Ok Google, [device or group name] on.“
    Example: Ok Google, living room on.
  • „Ok Google, [device or group name] off.“
    Example: Ok Google, living room off.
  • „Ok Google, set [device or group name] to 50 %.“
    Example: Ok Google, set living room to 50 %.
  • „Ok Google, turn [device or group name] red.“
    Example: Ok Google, turn living room red.

4. Apple Siri

You can also control your smart lights by voice via Apple's Siri voice assistant.
You need an Apple smartphone to be able to carry out the configuration.
Once set up, the lighting can also be controlled via an Apple HomePod.

4.1 Create a scene

Apple Siri - scenes

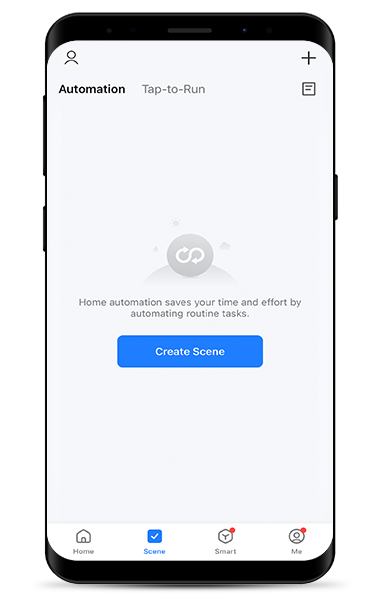
To be able to control a smart light with Siri, a scene must first be created in the Smart Life app. To do this, click on "Scene" in the lower menu bar and then on "Create scene".

Apple Siri - create scene

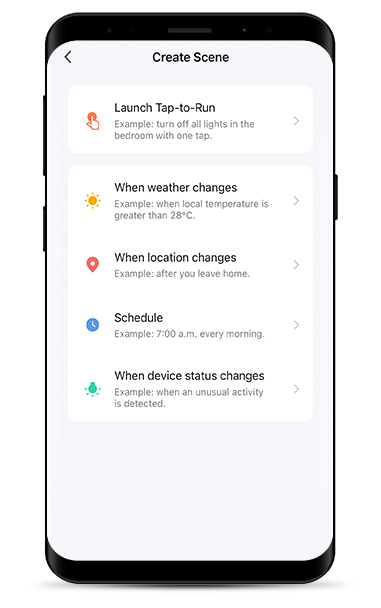
In the next step, you can select which type of scene you want to create. To create a scene for switching on or off, select the top scene type ("Launch Tap-to-Run").

Apple Siri - give scene name

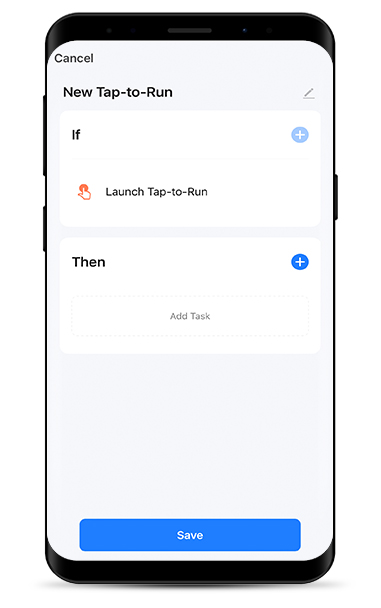
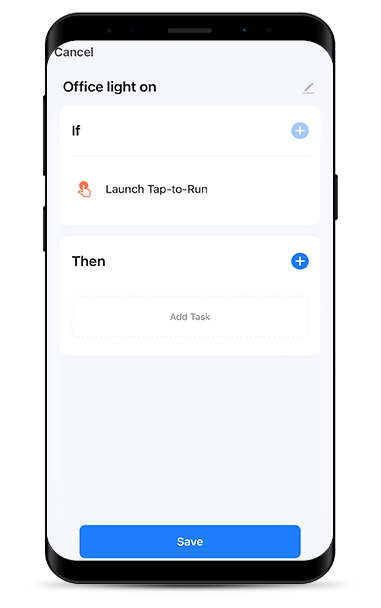
To configure the scene, select a suitable name in the first step (this is required for Siri control), e.g. "Office lamp on". Enter the name by clicking on the pencil at the top right.

Apple Siri - scene configuration

Click on the plus next to the "Then" to select a scene.

Apple Siri - select scene

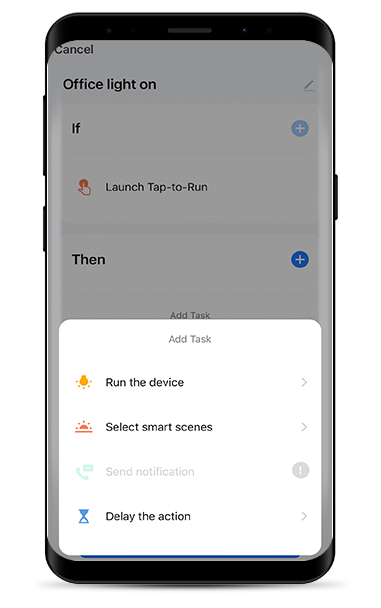
Click on "Run the device" to select a light.

Apple Siri - select light

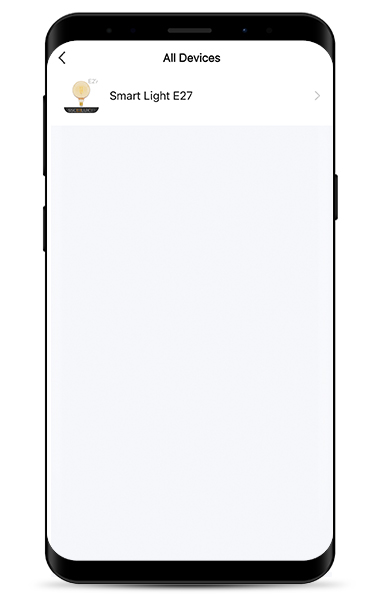
Select the light(s) you want to control with Siri.

Apple Siri - select scene

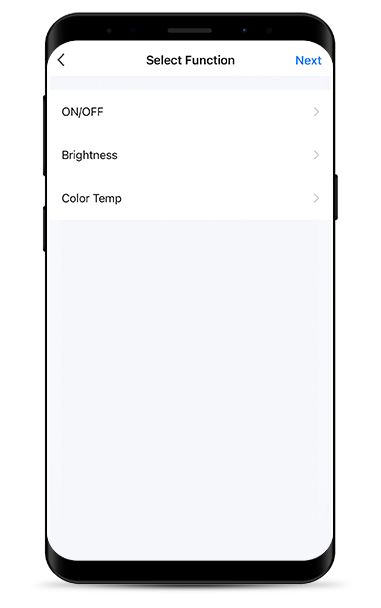
In the next step, you can select which function you want to set up as a scene. Click on "ON/OFF" to configure a scene for switching on or off.

Apple Siri - On/OFF scene

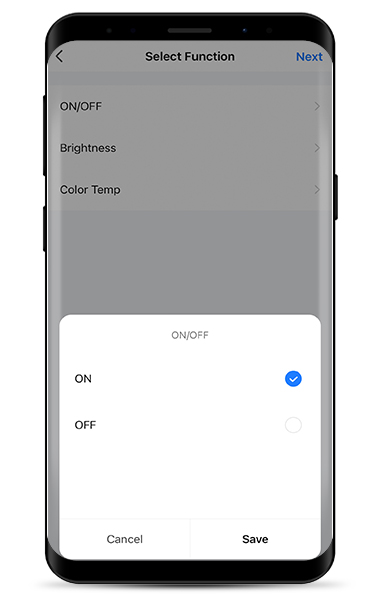
Select the desired function and click on "Save".

Apple Siri - save scene

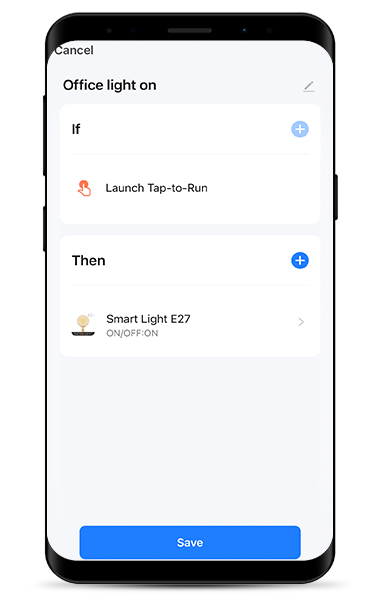
Click on "Save" in the last step.

4.2 Add a scene to Siri

Apple Siri -  scene overview

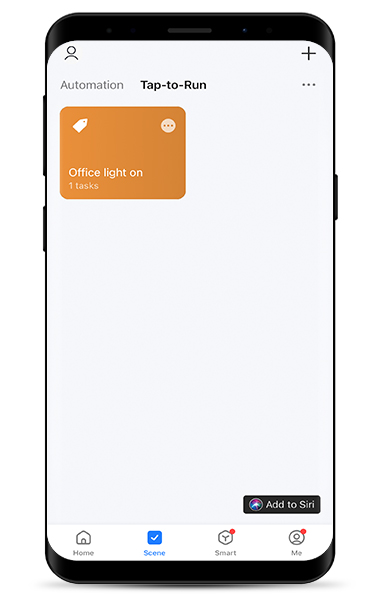
In the scene menu you will find all the scenes you have created ("Tap-to-Run" Tab). Click on "Add to Siri" at the bottom left.

Apple Siri - Siri configuration

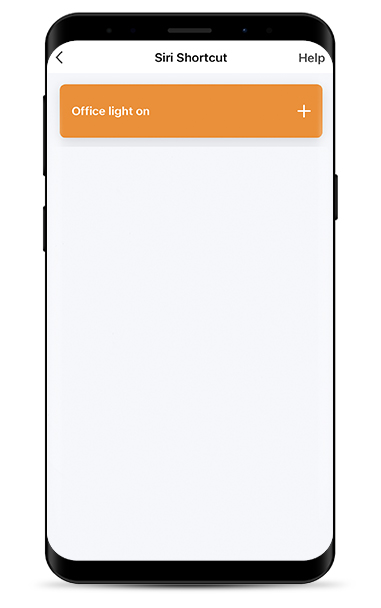
Select the desired scene by clicking on the plus sign.

Apple Siri - add scene to siri

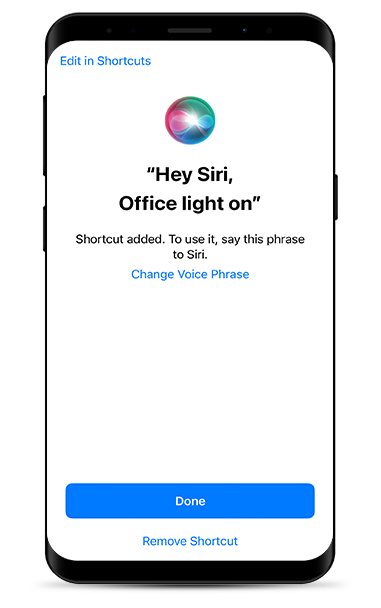
Click on "Done" to add the shortcut.

Apple Siri - shortcuts

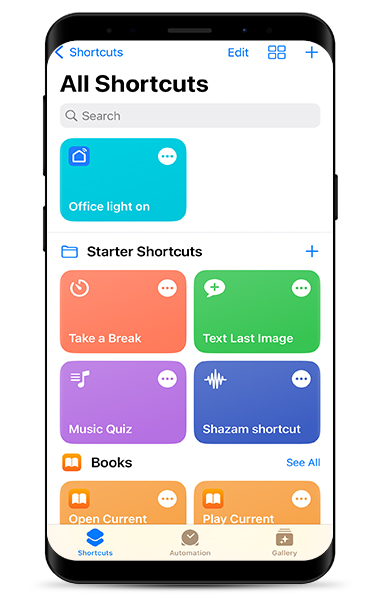
In the Apple app "Shortcuts" you will now find the scene you added. You can switch on the lamp with the voice command "Hey Siri, office light on".